

17 min read
Have you noticed your smart toilet remote acting up or losing response? If your remote’s battery is running low, it can quickly turn a convenient experience into a frustrating one.
Replacing the battery might seem tricky, but it’s easier than you think—and doing it right can save you time and hassle. You’ll discover simple steps to replace your smart toilet remote battery quickly and keep your bathroom routine smooth and worry-free.
Keep reading to make sure your smart toilet works perfectly every time you need it.

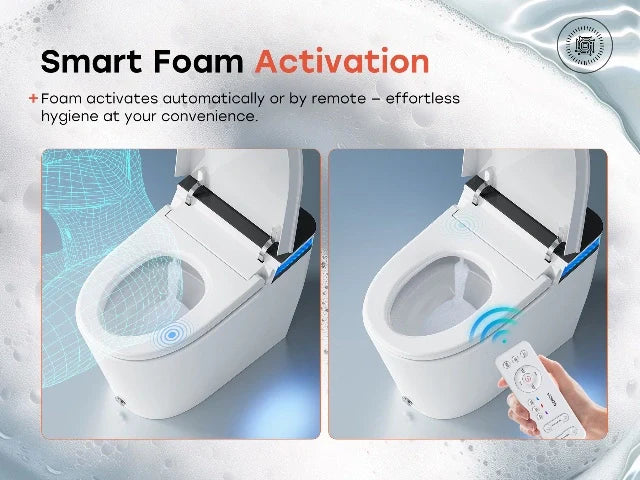
Credit: www.amazon.com
Identifying Your Remote Model
Knowing your smart toilet remote model helps you replace the battery correctly. Each model may use different batteries.
Check the remote carefully to find model details. This information guides you in choosing the right battery type.
Checking Model Number
Look at the back or inside the battery cover for the model number. It is often printed or engraved on a label.
The model number usually contains letters and numbers. Write it down or take a photo to use later.
- Open the battery cover gently
- Find the label or stamp with the model number
- Note down the exact code without errors
Battery Type And Specifications
Smart toilet remotes use different batteries like AAA, AA, or coin cells. Check the old battery for type and size.
Look for voltage and capacity details on the battery. Using the correct battery keeps your remote working well.
| Battery Type | Common Size | Voltage |
|---|---|---|
| AAA | 10.5 x 44.5 mm | 1.5V |
| AA | 14.5 x 50.5 mm | 1.5V |
| Coin Cell | CR2032 (20 x 3.2 mm) | 3V |
Tools Needed
Replacing the battery in a smart toilet remote is simple. You only need a few tools to do it safely.
Using the right tools helps protect the remote and makes the process faster.
Common Tools
You will need basic tools to open the battery compartment and replace the battery.
- Small Phillips screwdriver to remove screws
- Flathead screwdriver or prying tool to open the case
- Tweezers to handle small batteries safely
- New battery that fits your remote model
Optional Accessories
Some extra tools can make the battery replacement easier and safer.
- Magnifying glass to see small screws and battery details
- Soft cloth to protect the remote from scratches
- Small container to keep screws from getting lost
- Isopropyl alcohol and cotton swabs to clean the battery contacts
Preparing For Replacement
Replacing the battery in your smart toilet remote helps keep it working well. Before starting, you need to get ready carefully.
Proper preparation saves time and stops damage to the remote or battery. Follow these simple steps before you replace the battery.
Power Off The Remote
Turn off the smart toilet remote before you open it. This stops any electrical issues and keeps you safe.
Look for the power button or switch on the remote. Press and hold it until the screen or lights go off.
- Find the power button on the remote.
- Press and hold it until the device turns off.
- Check the remote shows no lights or screen activity.
Find A Clean Workspace
Use a clean and flat surface to replace the battery. This helps prevent losing small parts or damaging the remote.
Clear any clutter from the area. Use a towel or soft cloth to protect the remote from scratches.
- Choose a flat, stable surface like a table.
- Remove any items that could get in the way.
- Place a soft cloth or towel on the surface.
- Keep small containers handy for screws or parts.
Removing The Old Battery
Replacing the battery in your smart toilet remote is easy. Removing the old battery carefully keeps the remote safe.
Follow simple steps to open the battery compartment and take out the old battery.
Opening The Battery Compartment
Find the battery compartment on the back of the remote. It usually has a small cover or latch.
Use your fingers or a small tool to gently open the cover. Avoid using too much force to prevent damage.
- Look for a sliding cover or a small screw
- If there is a screw, use a small screwdriver
- Slide or lift the cover to open the compartment
Safely Removing The Battery
Once the compartment is open, find the old battery inside. It may be held in place by clips or a small holder.
Remove the battery carefully to avoid damage or short circuits. Do not use metal tools that can cause sparks.
- Note the battery type and orientation before removal
- Use your fingers or a plastic tool to lift the battery
- Place the old battery in a safe container for recycling
Installing The New Battery
Replacing the battery in your smart toilet remote is simple. Follow the steps carefully to ensure proper installation.
Using the correct battery and handling it gently helps your remote work well for a long time.
Correct Battery Orientation
Check the battery compartment for symbols that show how to place the battery. Align the plus (+) and minus (-) ends correctly.
Inserting the battery the wrong way can cause the remote to stop working or damage it.
- Look for + and – signs inside the compartment
- Match the battery ends to these signs
- Place the battery gently to avoid bending
Securing The Compartment Cover
After inserting the battery, put the compartment cover back in place. Make sure it fits tightly to protect the battery.
A loose cover can cause the battery to fall out or the remote to stop working.
- Align the cover with the compartment opening
- Press down gently until it clicks or fits snugly
- Check that the cover does not move or fall off
Testing The Remote
Testing the remote is important after replacing its battery. It helps make sure the remote works well.
This guide shows simple ways to test your smart toilet remote. You can check if it powers on and works right.
Powering On
First, press the power button on the remote. Look for a light or sound that shows it is on.
If the remote does not turn on, check the battery placement. Make sure the battery is new and installed correctly.
- Press the power button firmly
- Watch for indicator light or sound
- Check battery direction inside the remote
- Use a new battery if needed
Checking Functionality
Test all main buttons on the remote. Each button should trigger the correct toilet function.
Try functions like flush, bidet spray, and seat heating. If any button does not respond, check the battery again or clean the remote sensor.
- Press flush button and listen for flushing sound
- Activate bidet spray and check water flow
- Turn on seat heating and feel the temperature rise
- Clean sensor area if buttons don’t work
Troubleshooting Tips
Smart toilet remotes can stop working if the battery is low or dead. Knowing how to fix battery issues helps you keep the remote working.
This guide shows simple tips to solve common battery problems with smart toilet remotes.
Remote Not Responding
If the remote does not respond, the battery may be weak or dead. Check if the battery is installed correctly.
Sometimes, cleaning the battery contacts can help. Dirt or corrosion can stop power flow.
- Remove the battery cover carefully
- Check battery orientation (plus and minus signs)
- Clean contacts with a dry cloth
- Replace old or dead batteries
- Test remote after battery replacement
Battery Drain Issues
Batteries may drain fast if the remote is used too often or left powered on. Turn off the remote when not in use.
Extreme temperatures can also affect battery life. Keep the remote away from heat or cold areas.
- Limit remote use to necessary times
- Turn off remote after use
- Store remote in a cool, dry place
- Use high-quality batteries for longer life
- Check for battery leaks or damage regularly

Credit: www.amazon.com
Battery Maintenance Tips
Smart toilet remotes need good battery care to work well. Taking care of batteries helps avoid sudden failures.
Simple habits can keep your remote running longer and safer. Learn easy tips to maintain your battery.
Extending Battery Life
Turn off the remote when not in use. This saves battery power and lowers waste.
Replace batteries before they run out completely. Low batteries can damage the device.
- Keep the remote away from heat and sunlight.
- Use the battery type recommended by the manufacturer.
- Remove batteries if you will not use the remote for a long time.
- Clean battery contacts with a dry cloth to ensure good connection.
Safe Battery Disposal
Do not throw old batteries in the trash. They contain harmful chemicals that can pollute the environment.
Recycle batteries at special collection points. This helps protect the earth and saves resources.
- Find local battery recycling centers or drop-off locations.
- Store used batteries in a safe container until disposal.
- Do not mix old batteries with new ones in the remote.
- Follow local rules for battery disposal to avoid fines.
Credit: www.wayfair.com
Frequently Asked Questions
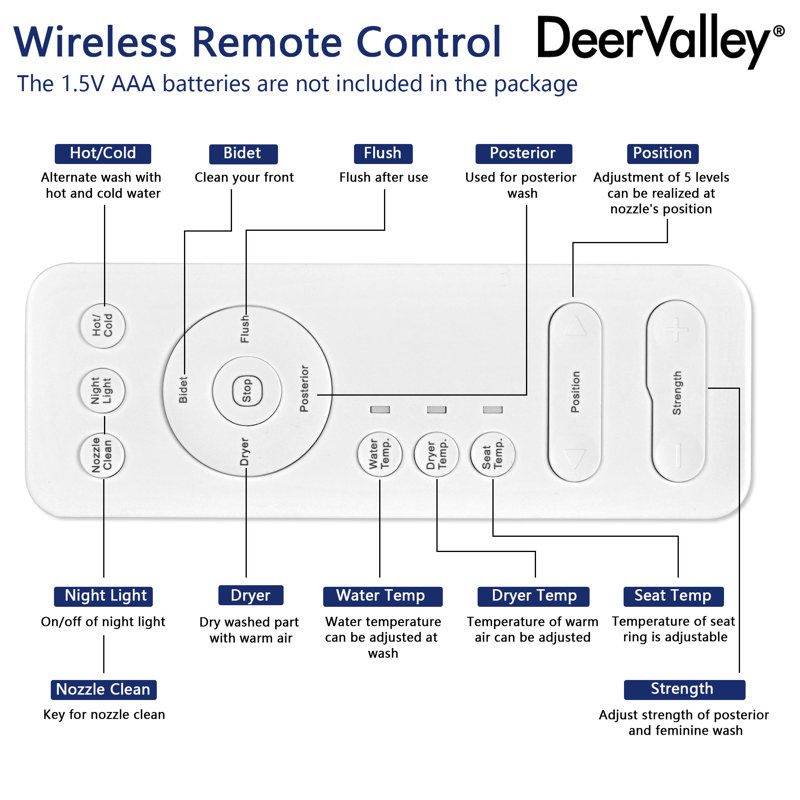
How Do I Replace The Battery In A Smart Toilet Remote?
To replace the battery, first remove the remote’s back cover gently. Take out the old battery and insert a new one matching the specified type. Ensure the battery is correctly aligned with the positive and negative terminals. Close the cover securely to resume normal use.
What Type Of Battery Does A Smart Toilet Remote Use?
Most smart toilet remotes use standard coin cell batteries like CR2032 or AAA batteries. Check your remote’s manual or battery compartment for the exact battery type. Using the correct battery ensures optimal performance and prevents damage to the remote control.
How Often Should I Replace Smart Toilet Remote Batteries?
Battery life varies but typically ranges from 6 months to 1 year. Replace the battery when the remote’s response slows or stops working. Regular checks and timely replacements keep your smart toilet functioning efficiently without interruptions.
Can I Use Rechargeable Batteries In Smart Toilet Remotes?
Rechargeable batteries are generally not recommended unless specified by the manufacturer. They often have different voltage levels which might affect remote performance. Always use the battery type listed in the user manual to avoid compatibility issues.
Conclusion
Replacing your smart toilet remote battery is simple and quick. Start by gathering the right tools. Make sure to purchase the correct battery type. Open the battery compartment carefully. Remove the old battery and insert the new one. Test the remote to ensure it works.
Regular checks can prevent unexpected failures. Enjoy uninterrupted convenience with a well-maintained remote. Taking these steps helps keep your smart toilet functioning smoothly. Happy maintenance!

