

16 min read
Imagine stepping out of a warm shower and wrapping yourself in a cozy, heated towel every single time. Installing a towel warmer in your bathroom can turn this simple luxury into your daily routine.
If you’ve ever wondered how to add this comfort to your home without the hassle, you’re in the right place. This guide will walk you through easy, step-by-step instructions to install a towel warmer yourself—no need to call a pro or spend a fortune.
Ready to upgrade your bathroom and enjoy that spa-like warmth? Keep reading to discover how simple it really is.
Choosing The Right Towel Warmer
Picking the right towel warmer makes your bathroom more comfortable. It keeps towels dry and warm all year long.
Consider the type, size, and power source before buying a towel warmer. These factors affect how well it fits your space.
Types Of Towel Warmers
Towel warmers come in different styles. Choose one that suits your bathroom design and heating needs.
- Electric: Plugs into a wall outlet for easy use.
- Hydronic: Connects to your hot water system.
- Wall-mounted: Saves floor space and looks neat.
- Freestanding: Can be moved and placed anywhere.
- Heated bars: Classic look with horizontal or vertical bars.
Sizing And Placement Tips
Choose a size that fits your bathroom and towel needs. Too big or small can be uncomfortable or useless.
Place your towel warmer near the shower or bath. Avoid spots that block movement or get in the way.
- Measure your wall space before buying.
- Allow enough clearance for hanging towels.
- Keep it away from water splashes for safety.
- Consider height for easy reach.
Power Source Options
Know your power source to ensure the towel warmer works well. Different models use different energy types.
Electric warmers need nearby outlets. Hydronic warmers require plumbing connections. Choose what fits your bathroom setup.
- Electric: Easy to install, uses standard power.
- Hydronic: Uses hot water, may need a plumber.
- Dual-fuel: Combines electric and hydronic for flexibility.
Tools And Materials Needed
Installing a towel warmer requires some basic tools and materials. Preparing these items will make the job easier and safer.
This guide covers the essential tools, safety equipment, and additional supplies you need.
Essential Tools
You need specific tools to install a towel warmer correctly. These tools help you mount and connect the unit safely.
- Drill with drill bits
- Screwdriver (Phillips and flathead)
- Adjustable wrench
- Measuring tape
- Level
- Pipe cutter (if plumbing adjustments are needed)
- Wire stripper (for electric models)
Safety Equipment
Safety is important when installing a towel warmer. Use protective gear to avoid injuries.
- Safety goggles to protect eyes
- Work gloves to protect hands
- Dust mask if drilling into walls
- Non-slip shoes for stable footing
Additional Supplies
Besides tools and safety gear, you may need extra supplies. These help finish the installation properly.
- Wall anchors or mounting brackets
- Plumber’s tape for pipe sealing
- Electrical tape for wiring
- Silicone sealant to prevent leaks
- Cleaning cloth to wipe surfaces
Preparing The Installation Area
Installing a towel warmer needs careful preparation. You must get the area ready before starting.
Proper preparation helps ensure the towel warmer works safely and lasts a long time.
Selecting The Mounting Location
Choose a spot where the towel warmer fits well and is easy to reach. Avoid placing it near water sources.
Pick a location that allows air to flow around the warmer. This helps it heat towels evenly.
- Mount it near your bathroom or shower area
- Ensure enough wall space for the towel warmer size
- Avoid spots where towels can block heat
Checking Wall Structure
Check if your wall can hold the towel warmer’s weight. Some warmers are heavy when filled with water.
Find the wall studs using a stud finder or tap the wall to listen for solid spots.
- Use studs to secure the mounting brackets
- Avoid drywall-only areas for heavy warmers
- If needed, use wall anchors made for heavy loads
Turning Off Power
Always turn off power before starting the installation. This prevents electric shocks or damage.
Switch off the circuit breaker that controls the towel warmer’s outlet or wiring.
- Locate the correct breaker in your electrical panel
- Turn it off and test with a voltage tester
- Do not touch wires until power is confirmed off
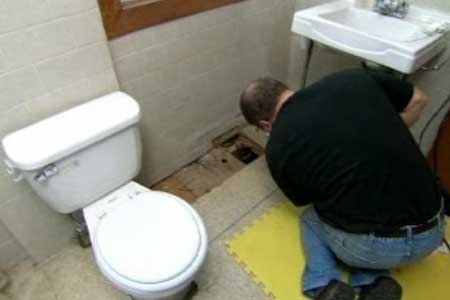
Credit: www.youtube.com
Mounting The Towel Warmer
Mounting a towel warmer correctly is important for safety and function. Follow simple steps to install it firmly on the wall.
This guide covers marking drill points, drilling and anchoring, and securing the towel warmer.
Marking Drill Points
First, decide the exact spot where you want to mount the towel warmer. Use a level to keep it straight.
Mark the drill points on the wall through the mounting brackets. These marks show where to drill holes.
- Hold the warmer against the wall
- Use a pencil to mark holes in brackets
- Check marks with a level to ensure evenness
Drilling And Anchoring
Use a drill bit that matches the size of your wall anchors. Drill holes carefully at the marked points.
Insert wall anchors into the holes. Anchors hold screws tightly in drywall or plaster.
- Choose drill bit size based on anchor instructions
- Drill straight holes at marked points
- Push anchors fully into holes
Securing The Warmer
Align the towel warmer brackets with the anchors. Insert screws through brackets into the anchors.
Tighten screws until the warmer is firmly fixed. Avoid overtightening to prevent damage.
- Place warmer on wall matching drill points
- Insert screws into anchors through brackets
- Use a screwdriver to tighten screws securely
- Check stability by gently pulling the warmer
Electrical Connections
Installing a towel warmer requires safe electrical connections. This guide explains how to connect it properly.
Follow simple steps to wire, connect to power, and test your towel warmer for safe use.
Wiring Basics
Understand the wiring before starting. Most towel warmers use a 120V or 240V power supply.
Use correct wire gauge and follow local electrical codes for safety.
- Turn off power at the circuit breaker before wiring
- Use insulated wires rated for the towel warmer’s voltage
- Check the manufacturer’s wiring diagram for correct connections
- Ensure all connections are tight and secure
Connecting To Power
Connect the towel warmer to a dedicated circuit. This prevents overloads and ensures safety.
Use a junction box to house the wiring connections and protect them from moisture.
- Attach the ground wire to the grounding screw
- Connect the live (hot) wire to the switch or thermostat
- Connect the neutral wire if required by the model
- Double-check all wire colors and positions
Testing The Setup
After wiring, turn the power back on to test the towel warmer. Check that it heats up correctly.
Use a voltage tester to confirm proper power flow and no short circuits.
- Switch on the circuit breaker
- Turn on the towel warmer’s control switch
- Wait a few minutes to feel heat from the warmer
- Use a voltage tester at the terminals to check for correct voltage
- If any issues occur, turn off power and inspect wiring

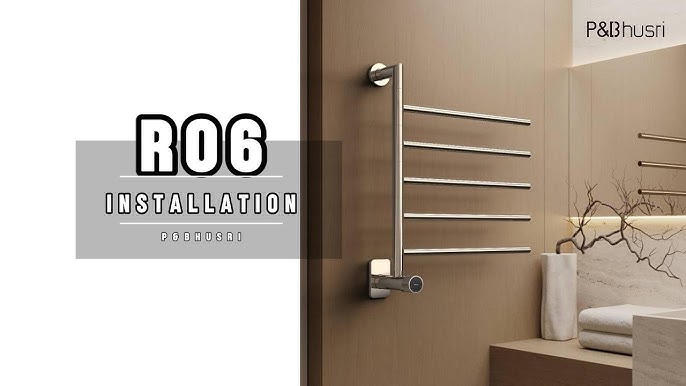
Credit: www.warmlyyours.com
Final Touches And Maintenance
Installing a towel warmer is only the first step. Proper care keeps it working well for years. This guide covers sealing, cleaning, and fixing common problems.
Follow these simple tips to keep your towel warmer safe and efficient. Regular maintenance also improves its look and function.
Sealing And Finishing
After installation, check all joints and connections. Use a sealant to stop leaks and protect pipes from moisture. This step helps avoid water damage.
Paint or polish any visible parts to match your bathroom style. This adds a clean, finished look to your towel warmer.
- Apply plumber’s tape to threaded joints
- Use waterproof sealant around wall fittings
- Check for any gaps or loose parts
- Paint metal parts with rust-proof paint
Routine Cleaning Tips
Clean your towel warmer weekly to keep it shiny and working well. Dust and grime can build up and reduce heat output.
Use gentle cleaning products to avoid damage. Avoid harsh chemicals that could harm the finish or internal parts.
- Wipe surfaces with a soft damp cloth
- Use mild soap and water for stains
- Dry thoroughly to prevent rust
- Do not use abrasive scrubbers or steel wool
Troubleshooting Common Issues
If your towel warmer does not heat up, check the power supply or water flow. Sometimes air blocks or loose wires cause problems.
Look for leaks or unusual noises. Fixing small issues early can stop big damage later.
- Ensure the unit is plugged in and switched on
- Bleed air from the system if heating is uneven
- Tighten any loose connections or screws
- Inspect for leaks and repair with sealant
- Contact a professional if electrical parts fail

Credit: www.warmlyyours.com
Frequently Asked Questions
What Tools Are Needed To Install A Towel Warmer?
You need a drill, screwdriver, level, measuring tape, and mounting hardware. Electrical tools like wire strippers are also essential for wiring.
How Do I Connect A Towel Warmer To Power Safely?
Turn off the main power before wiring. Connect wires according to the manual, and use a licensed electrician if unsure.
Can I Install A Towel Warmer On Any Wall Type?
Yes, but use appropriate anchors for drywall or masonry. Ensure the wall can support the unit’s weight securely.
How Long Does It Take To Install A Towel Warmer?
Installation typically takes 1 to 2 hours, depending on your experience and the unit’s complexity.
Conclusion
Installing a towel warmer enhances your bathroom experience. Warm towels add comfort. Follow the steps carefully. Safety first, always. Gather your tools in advance. Double-check all connections. This ensures proper installation. Enjoy the soothing warmth daily. A towel warmer adds luxury.
It’s a simple upgrade. No need for professional help. Just take your time. Reap the benefits of warm towels. Embrace this small change. Your bathroom will feel cozier. A great addition indeed.

