

17 min read
Have you ever noticed your automatic flush not working quite right? Maybe it flushes too early, too late, or not at all.
This can be frustrating and unhygienic. The good news is, you can fix this yourself by adjusting the auto flushing sensor. You’ll discover simple steps to fine-tune your sensor for smooth, efficient flushing every time. Keep reading to take control of your bathroom’s hygiene and save water without any hassle.
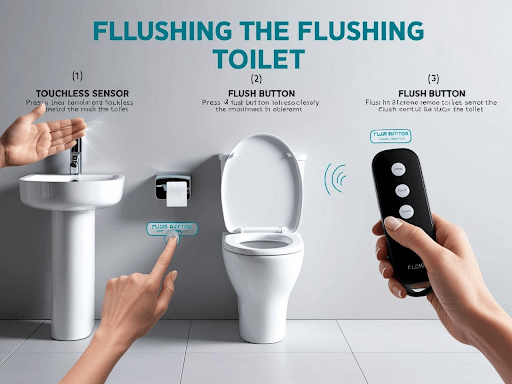
How Auto Flushing Sensors Work
Auto flushing sensors activate toilets or urinals without touching them. They use technology to detect when a person moves away. This starts the flushing process automatically.
The sensors help save water by controlling flush time. They make bathrooms cleaner and more hygienic. Adjusting these sensors ensures they work correctly every time.
Types Of Auto Flushing Sensors
There are several types of sensors used in auto flushing systems. Each type detects presence differently to trigger flushing. Choosing the right sensor affects performance and water savings.
- Infrared Sensors: Detect heat and movement of a person.
- Ultrasonic Sensors: Use sound waves to sense distance changes.
- Capacitive Sensors: Detect changes in electrical charge nearby.
- Pressure Sensors: Sense changes in pressure on a surface.
Sensor Components And Functions
Auto flushing sensors have key parts that work together. Each part has a specific role to detect users and control flushing.
- Sensor Lens:Captures signals like infrared or ultrasonic waves.
- Processor:Interprets sensor signals to detect presence.
- Valve Control:Opens and closes the flush valve.
- Power Supply:Provides energy to the sensor system.
- Adjustment Knobs or Buttons:Allow changes in sensor range and flush timing.

Credit: www.amazon.com.be
Common Issues With Auto Flushing Sensors
Auto flushing sensors help keep bathrooms clean by flushing automatically. These sensors can sometimes have problems that stop them from working right.
Knowing the common issues with these sensors can help you fix them quickly. Below are some frequent problems users face.
Sensor Sensitivity Problems
Sensors may not detect users properly if sensitivity is wrong. Too low sensitivity means it might not sense a user nearby.
High sensitivity can cause the sensor to trigger too often. This leads to waste of water and frustration.
- Adjust sensor sensitivity to the correct level
- Keep the sensor clean and free from dirt
- Check for any obstructions near the sensor
Delayed Or No Flushing
Sometimes the flush happens late or not at all. This can happen if the sensor is dirty or the batteries are low.
Electrical problems or a faulty sensor also cause flushing delay or failure.
- Clean the sensor lens regularly
- Replace batteries on time
- Inspect wiring for damage
- Reset or replace the sensor if needed
False Activations
False activations happen when the flush triggers without a user. This wastes water and causes noise.
Common causes include reflections, moving objects, or a sensor set to too high sensitivity.
- Lower the sensor sensitivity
- Remove shiny or moving objects near the sensor
- Check sensor position and adjust if needed
- Keep the sensor clean and dry
Tools Needed For Sensor Adjustment
Adjusting an auto flushing sensor requires the right tools. Using proper tools helps you make accurate changes.
Having these tools ready will save time and prevent damage to the sensor or fixture.
Screwdrivers
Screwdrivers are essential to open sensor covers or adjust screws. Both flathead and Phillips types are useful.
Use the right size screwdriver to avoid stripping screws or damaging the sensor casing.
Multimeter
A multimeter measures electrical signals in the sensor. It helps check if the sensor gets power and works correctly.
Using a multimeter ensures you diagnose sensor issues before adjusting settings.
Small Wrench Or Pliers
Some sensors use nuts or bolts for mounting. A small wrench or pliers help loosen or tighten these parts safely.
These tools give you a better grip without damaging metal parts.
Cleaning Cloth
A soft cleaning cloth removes dirt or water spots from the sensor lens. A clean lens helps the sensor work well.
Keep the cloth dry and avoid harsh chemicals that may harm sensor parts.
User Manual Or Adjustment Guide
The user manual shows the correct steps for adjusting your specific sensor model. It may include diagrams and safety tips.
Always follow the guide to avoid incorrect adjustments or damage.
Step-by-step Sensor Adjustment
Adjusting an auto flushing sensor helps save water and keeps toilets clean. This guide shows how to adjust the sensor correctly.
Follow these steps to locate controls, set the range, adjust sensitivity, and test the sensor response.
Locating The Adjustment Controls
First, find the sensor adjustment controls on your auto flush device. These controls are often behind a cover or near the sensor lens.
Use a flashlight if needed to see small dials or buttons clearly.
- Check near the sensor lens for small knobs or switches
- Look behind removable covers or panels
- Refer to the device manual if controls are hard to find
Setting Sensor Range
Sensor range controls how far the sensor detects motion. Adjust the range to avoid false triggers or missed flushes.
Turn the range dial slowly and test to find the best distance for your bathroom setup.
- Start with the sensor range set to medium
- Increase range if the sensor misses motion
- Decrease range to prevent flushing from far away
Adjusting Sensitivity Levels
Sensitivity controls how easily the sensor reacts to motion. Higher sensitivity detects small movements, lower sensitivity needs bigger motions.
Adjust sensitivity to avoid unwanted flushes or failures to flush.
- Set sensitivity low if the sensor triggers too often
- Raise sensitivity if the sensor misses user presence
- Make small adjustments and test each time
Testing The Sensor Response
After adjustments, test the sensor by moving in front of it. Ensure it flushes only when needed.
If the sensor works well, no further changes are needed. Repeat adjustments if the sensor misses or flushes too often.
- Stand at different distances to check sensor range
- Move slowly and quickly to test sensitivity
- Observe flush timing and response consistency
Maintenance Tips For Long-lasting Performance
Auto flushing sensors keep toilets clean without touch. Proper care helps these sensors work well for a long time.
Regular maintenance prevents issues and saves money on repairs. Use simple steps to keep sensors active and reliable.
Regular Cleaning Procedures
Clean the sensor area often to stop dirt buildup. Dirt can block the sensor and cause flushing errors.
Use a soft cloth and mild soap for cleaning. Avoid strong chemicals that can damage the sensor.
- Turn off the water supply before cleaning
- Wipe the sensor gently with a damp cloth
- Remove hard water stains carefully
- Check for cracks or damage while cleaning
Battery Replacement Guidelines
Replace batteries regularly to keep the sensor working well. Low batteries cause weak or no flushing.
Use the correct battery type recommended by the manufacturer. Remove old batteries safely to avoid leaks.
- Check battery life every 6 months
- Use fresh, high-quality batteries
- Insert batteries with the right polarity
- Dispose of old batteries properly
Troubleshooting Common Problems
Sensors may stop flushing or flush too often. Check for simple issues before calling a technician.
Look for sensor blockages or weak batteries first. Reset the sensor if it acts strange.
- Clean sensor lens to remove dirt
- Replace batteries if power is low
- Make sure sensor faces the right direction
- Reset the system by turning power off and on
- Check water pressure for proper flow

Credit: www.amazon.ca
When To Call A Professional
Auto flushing sensors help keep toilets clean without manual work. Sometimes these sensors stop working well. It is important to know when to call a professional for fixing them.
Trying to fix the sensor yourself might cause more damage. A trained technician can adjust or repair the sensor safely and quickly.
Signs Sensor Needs Repair
Recognizing sensor problems early can save water and prevent damage. Look for these common signs that your auto flushing sensor needs repair.
- Toilet flushes too often or not at all
- Sensor does not respond when you approach
- Water runs continuously after flushing
- Sensor light blinks or stays off
- Unusual noises during flushing
If you see any of these signs, call a professional. They can diagnose and fix the issue correctly.
Choosing The Right Technician
Picking a skilled technician is important for sensor repair. A good technician saves time and prevents future problems.
Look for these qualities when choosing a technician for auto flushing sensor adjustment.
- Experience with plumbing sensors and auto flush systems
- Positive customer reviews and references
- Proper licensing and insurance
- Clear pricing and no hidden fees
- Quick response and good communication
Choosing the right technician ensures your sensor works well for a long time.

Credit: techobath.com
Frequently Asked Questions
How Do I Adjust An Auto Flushing Sensor?
To adjust an auto flushing sensor, locate the sensor’s adjustment screw or dial. Turn it slowly to set the desired sensitivity or range. Test the flush after each adjustment to ensure proper operation and avoid water wastage.
Why Is My Auto Flushing Sensor Not Working?
An auto flushing sensor may fail due to dirt, misalignment, or low battery. Clean the sensor lens, check its position, and replace batteries if needed. Regular maintenance ensures consistent flushing performance.
How Often Should I Adjust Auto Flushing Sensors?
Adjust auto flushing sensors when you notice inconsistent flushing or water wastage. Regular checks every 6-12 months help maintain optimal sensor response and prevent malfunction.
Can I Adjust Auto Flushing Sensors Myself?
Yes, most auto flushing sensors are designed for easy user adjustment. Follow the manufacturer’s instructions carefully to avoid damage. If unsure, consult a professional plumber for assistance.
Conclusion
Adjusting auto flushing sensors improves restroom efficiency. It’s essential for user comfort. Proper settings reduce water waste and maintain hygiene. Regular checks ensure sensors work correctly. This extends the lifespan of restroom fixtures. Adjustments can be done easily with simple tools.
Follow manufacturer guidelines for best results. Consistent maintenance keeps restrooms clean and functional. Always prioritize user convenience and environmental care. Making these adjustments offers long-term benefits. Better restroom experiences lead to satisfied users. A small change can make a big difference.
Stay proactive in maintaining sensor performance. Keep your restrooms efficient and inviting for everyone.

