

17 min read
Are you tired of plain, boring vanity trays that don’t match your style? Imagine turning a simple tray into a stunning centerpiece that reflects your personality perfectly.
With a little creativity and easy steps, you can customize your own vanity tray to make your space feel truly yours. Keep reading, and you’ll discover how simple changes can transform your daily routine and add a touch of elegance to your room.
Ready to make your vanity uniquely yours? Let’s dive in!
Credit: www.lemon8-app.com
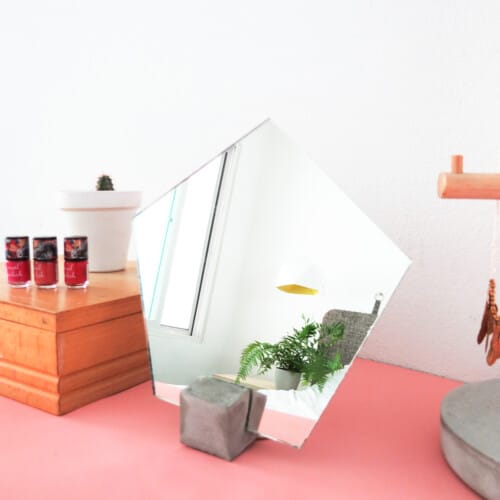
Choosing Your Base Tray
Picking the right base tray is key to a great DIY vanity tray. Your tray sets the style and function.
Think about where you will place the tray and what you want to store on it. This helps in choosing well.
Materials To Consider
Base trays come in many materials. Each one has its look and feel. Choose what fits your style.
Some materials are easy to customize. Others are strong and last long. Think about your needs.
- Wood: Warm and classic. Easy to paint or stain.
- Metal: Sleek and modern. Durable and sturdy.
- Glass: Elegant and clear. Needs careful handling.
- Acrylic: Lightweight and colorful. Good for bright styles.
- Tray with mirror base: Adds shine and depth.
Size And Shape Options
Think about the size of your vanity space. The tray should fit well and not crowd the area.
Shape also matters. It can change the look and how items fit on your tray.
- Rectangular: Offers more surface area for items.
- Square: Compact and neat for small spaces.
- Round: Softens the look with smooth edges.
- Oval: Stylish and less common shape.
- Custom shapes: Unique trays for a personal touch.
Selecting Decorative Elements
Decorating a DIY vanity tray lets you add your personal style. Picking the right elements makes your tray unique.
Think about materials and colors that match your room. Small details can make a big difference.
Paint And Finishes
Paint changes the look of your tray quickly. Choose colors that fit your space and taste.
Finishes protect the paint and add shine or texture. Glossy finishes reflect light, while matte looks soft.
- Use spray paint for smooth, even coats
- Try acrylic paint for easy cleanup
- Seal with clear varnish to protect your design
- Test finishes on a small area first
Adding Fabric Or Paper Liners
Fabric and paper liners add color and pattern inside the tray. They also protect the base from scratches.
Choose patterns that match your style. You can change liners anytime to refresh the look.
- Cut fabric or paper to fit the tray bottom
- Use glue or double-sided tape to secure liners
- Pick washable fabric for easy cleaning
- Try patterned paper for a quick style update
Using Decals And Stickers
Decals and stickers add fun details without much effort. They come in many shapes and designs.
Place decals on smooth surfaces for best results. Seal them to keep them from peeling off.
- Pick waterproof decals for durability
- Arrange stickers before sticking down
- Use a clear coat spray to protect decals
- Mix different styles for a custom look
Tools And Supplies Needed
Customizing a DIY vanity tray is a fun way to add style to your space. You need the right tools and supplies to get started.
Gathering these items before you begin helps your project go smoothly and look great.
Essential Craft Tools
Having the right craft tools makes your work easier and more precise. Basic tools help you cut, measure, and finish your tray.
- Measuring tape or ruler for accurate sizing
- Scissors or craft knife to cut materials
- Paintbrushes for painting or sealing
- Sanding block or sandpaper to smooth surfaces
- Pencil for marking measurements
- Protective gloves to keep hands safe
Adhesives And Sealants
Choosing the right adhesive keeps your tray parts firmly together. Sealants protect your design and help it last longer.
- Strong craft glue for attaching decorations
- Hot glue gun for quick bonding
- Clear sealant spray to protect paint and surfaces
- Mod Podge or similar decoupage glue for layering paper or fabric
Credit: www.lemon8-app.com
Step-by-step Customization Process
Customizing a vanity tray is a fun way to add style to your space. You can create a unique look with simple steps.
This guide will walk you through each part of the process. Follow along to make your own beautiful tray.
Preparing The Tray Surface
Start by cleaning the tray well. Remove any dust or grease so paint will stick better.
Lightly sand the surface to make it smooth. This helps the paint and decorations hold on.
- Wipe the tray with a damp cloth
- Use fine sandpaper to smooth the surface
- Remove sanding dust with a clean cloth
Applying Base Coats And Patterns
Apply a base coat of paint to cover the entire tray. Let it dry completely before adding more layers.
Add patterns or designs with stencils or freehand painting. Use colors that match your style.
- Use a brush or sponge for even paint application
- Apply thin coats to avoid drips
- Allow each layer to dry before the next
- Draw or stencil patterns carefully
Attaching Decorative Add-ons
Add decorations like gems, beads, or small figurines to your tray. Use strong glue made for crafts.
Place the add-ons in your desired spots. Press firmly so they stick well and stay in place.
- Choose lightweight decorations
- Test glue on a small area first
- Let glue dry fully before moving the tray
Sealing And Protecting The Design
Use a clear sealant to protect your design from scratches and spills. Choose one that works with your paint type.
Apply the sealant in thin, even coats. Let each coat dry before adding the next for best results.
- Use a spray or brush-on sealant
- Apply 2-3 coats for strong protection
- Allow full drying time before use
Creative Design Ideas
Customizing a DIY vanity tray lets you add a personal touch to your space. You can make it fit your style and needs perfectly.
Try different design ideas to create a tray that looks beautiful and works well for you. Use colors, textures, and decorations you like.
Minimalist Styles
Minimalist trays focus on clean lines and simple shapes. Use neutral colors like white, gray, or black for a calm look.
Keep decorations to a minimum. Choose a small plant or a single candle to add a soft touch without clutter.
- Use smooth materials like glass or metal
- Pick a simple shape, such as a circle or square
- Limit items on the tray to essentials only
- Use soft, neutral colors for paint or finish
Vintage And Rustic Looks
Vintage and rustic trays use natural wood and aged finishes. These trays bring warmth and charm to your vanity.
Add small details like lace, old keys, or metal handles. Use paint that looks worn or chipped for a true vintage feel.
- Choose reclaimed wood or wood with visible grain
- Add metal or brass accents for an old-fashioned touch
- Use soft, faded colors like cream, brown, or sage green
- Decorate with vintage finds like jewelry or small bottles
Glamorous And Sparkly Themes
Glam trays shine with glitter, metallic paint, and shiny surfaces. These trays add a touch of luxury and sparkle to your space.
Use gems, mirrors, or metallic foil to decorate. Choose bold colors like gold, silver, or rose gold for a dazzling look.
- Use glitter paint or adhesive gems for sparkle
- Choose mirrored or metallic tray bases
- Add crystal knobs or decorative handles
- Mix shiny materials with soft fabrics like velvet
Tips For Longevity And Maintenance
Custom vanity trays add charm to your space. Taking care of them helps keep their beauty. Simple steps can make your tray last longer.
Good maintenance saves you time and money. It also protects your hard work in making the tray unique.
Cleaning Your Vanity Tray
Clean your vanity tray regularly to avoid dust and dirt buildup. Use a soft cloth to prevent scratches. Avoid harsh cleaners that can damage the surface.
For wooden trays, use a damp cloth and mild soap if needed. Dry it immediately to stop water damage. For metal or glass trays, a gentle glass cleaner works well.
- Wipe with a soft, dry cloth daily
- Use mild soap and water for stains
- Avoid abrasive sponges or brushes
- Dry immediately after cleaning
- Use glass cleaner for glass surfaces
Avoiding Damage And Wear
Keep your vanity tray safe from heavy items that can cause dents or cracks. Avoid placing it in direct sunlight to stop fading. Handle the tray gently during use.
Use coasters or small mats under bottles or jewelry to prevent scratches and spills. Store the tray in a stable place to avoid falls and chips.
- Do not overload with heavy objects
- Keep out of direct sunlight
- Place coasters under bottles
- Handle with care when moving
- Store on a flat, stable surface
Credit: sugarandcloth.com
Frequently Asked Questions
How Do I Start Customizing A Vanity Tray?
Begin by selecting a tray that fits your style and space. Gather materials like paint, stencils, and decorative elements. Decide on a theme or color scheme to guide your design. Clean the tray thoroughly before applying any designs. Experiment with different techniques to achieve your desired look.
What Materials Are Best For A Vanity Tray?
Wood, acrylic, and metal are popular choices for vanity trays. Each material offers unique benefits. Wood is versatile and can be painted or stained. Acrylic provides a modern, sleek look. Metal adds an industrial or vintage touch. Choose materials that suit your aesthetic and functional needs.
Can I Personalize A Vanity Tray Easily?
Yes, personalizing a vanity tray is easy and fun. Use paint, stickers, or decals to add personal touches. Try using stencils for intricate designs or monograms. Add small decorative items like beads or rhinestones for extra flair. Personalization allows you to create a unique piece that reflects your style.
How Do I Maintain A Customized Vanity Tray?
To maintain your vanity tray, clean it regularly with a soft cloth. Avoid using harsh chemicals that may damage the design. For wooden trays, consider using a sealant to protect the surface. Regular dusting and careful handling will ensure your tray remains beautiful and functional over time.
Conclusion
Customizing your vanity tray adds a personal touch to your space. It makes your daily routine more enjoyable and organized. You can use simple materials and tools to create something unique. This project fits any style or budget. Try different colors, patterns, or decorations to match your taste.
Small changes bring big smiles. Start your DIY vanity tray today and enjoy a fresh, stylish look. Crafting is fun and rewarding. Give your vanity a new life with your own hands. Simple ideas, great results.

