15 min read
Imagine transforming your bathroom into a haven of hygiene and comfort. A bidet seat can make this dream a reality, offering you a refreshing and eco-friendly way to elevate your personal care routine.
But the thought of installing a bidet seat might seem daunting at first. Fear not, because this guide is designed to simplify the process for you. By the end of this article, you’ll have the confidence to tackle the installation yourself, saving you time and money.
Let’s dive in and discover how easy it is to enhance your bathroom experience, right from the comfort of your home.
Choosing The Right Bidet Seat
Picking the right bidet seat makes your bathroom more comfortable. It is important to know what options you have.
Consider your needs and your toilet type before buying a bidet seat. This helps ensure a good fit and easy use.
Types Of Bidet Seats
Bidet seats come in different styles. Each type offers different functions and prices.
- Non-electric bidet seats use water pressure only.
- Electric bidet seats have heated water and drying features.
- Remote control seats offer easy adjustments.
- Basic models focus on cleanliness without extra features.
Key Features To Consider
Look for features that improve comfort and hygiene. Choose what fits your budget and needs.
- Heated seat for warm comfort in cold weather.
- Adjustable water temperature and pressure.
- Self-cleaning nozzles for better hygiene.
- Warm air dryer to reduce toilet paper use.
- Energy-saving modes to lower power use.
Compatibility With Your Toilet
Not all bidet seats fit every toilet. Check your toilet shape and size first.
Most bidet seats fit round or elongated toilets. Measure your toilet seat before buying.
- Round toilets need smaller bidet seats.
- Elongated toilets need longer bidet seats.
- Check if your toilet has a standard or unusual shape.
- Look for mounting holes distance to match the bidet seat.

Credit: www.youtube.com
Gathering Tools And Materials
Installing a bidet seat is simple if you have the right tools. Gathering everything before you start saves time.
Make sure you prepare all tools and supplies for a smooth installation process.
Essential Tools Needed
You will need some basic tools to install your bidet seat. These tools help you remove the old seat and fit the new one.
- Adjustable wrench to tighten bolts
- Screwdriver (usually Phillips head)
- Teflon tape for sealing connections
- Measuring tape to check seat size
- Bucket or small container to catch water
Additional Supplies To Have
Besides tools, some extra supplies make installation easier and cleaner. These may not always be needed but are good to have.
- Cleaning cloths to wipe the area
- Plumber’s putty or silicone for sealing
- Extra washers or bolts in case of damage
- Flashlight for better visibility under the seat
- Protective gloves to keep hands clean
Preparing The Toilet Area
Before installing a bidet seat, prepare the toilet area carefully. This makes the installation easier and safer.
Proper preparation helps avoid leaks and ensures the bidet seat fits well. Start by turning off the water supply.
Turning Off The Water Supply
Locate the shut-off valve near the base of the toilet. Turn it clockwise to stop the water flow.
Flush the toilet to empty the tank. This lowers water pressure and prevents spills during installation.
- Find the valve behind or beside the toilet
- Turn it slowly to close it
- Flush to drain the tank
Removing The Existing Toilet Seat
Use a screwdriver or wrench to remove the bolts holding the seat. Keep the bolts in case you need them later.
Lift the toilet seat and lid off the bowl. Clean the area under the seat before installing the bidet seat.
- Locate the seat bolts at the back
- Unscrew bolts with proper tools
- Remove the seat and lid carefully
Cleaning The Toilet Rim
Wipe the toilet rim with a damp cloth to remove dirt and dust. A clean rim helps the bidet seat fit tightly.
Use mild soap if needed. Avoid harsh chemicals that can damage the toilet surface.
- Use a soft cloth or sponge
- Clean all around the rim
- Dry the area before installing

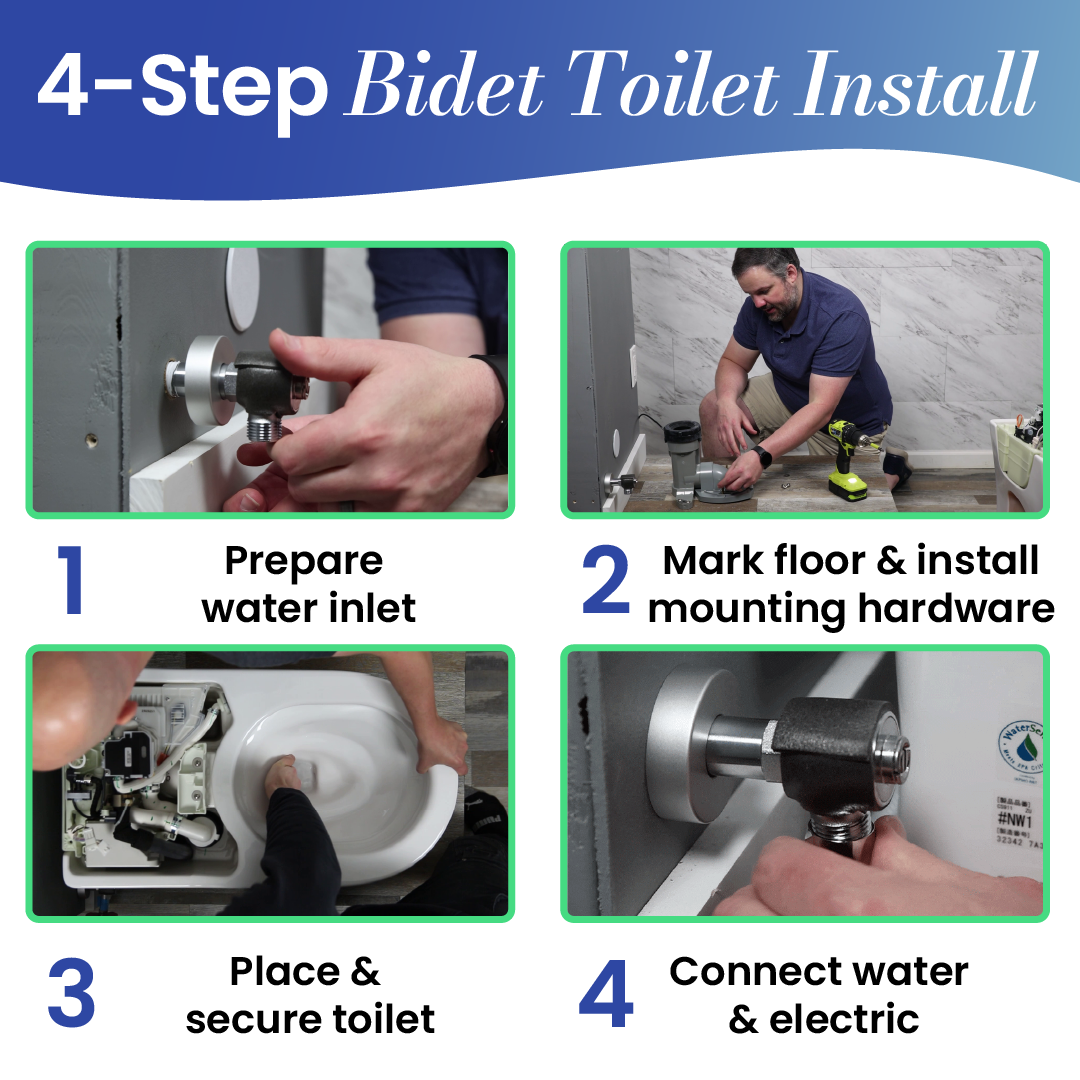
Credit: everflowbidets.com
Installing The Bidet Seat
Installing a bidet seat is a simple task you can do yourself. It only takes a few tools and some basic steps.
Follow these instructions carefully to install your bidet seat safely and correctly.
Attaching The Mounting Plate
Start by removing the existing toilet seat. Then place the mounting plate over the bolt holes on the toilet bowl.
Make sure the plate is aligned straight. Insert the bolts through the holes and tighten them to secure the plate.
- Remove old seat and clean the area
- Place mounting plate on the toilet bowl
- Insert bolts through the plate holes
- Tighten bolts evenly to fix the plate
Connecting The Water Supply Hose
Turn off the water supply valve near the toilet. Flush the toilet to empty the tank.
Disconnect the water hose from the toilet tank. Attach the T-valve from the bidet kit to the tank’s water inlet.
- Turn off water supply
- Flush toilet to drain water
- Disconnect hose from tank
- Attach T-valve to tank inlet
- Connect water hose to T-valve
Securing The Bidet Seat
Slide the bidet seat onto the mounting plate until it clicks in place. Make sure it is secure and does not move.
Turn the water supply back on. Check for leaks around the connections before using the bidet seat.
- Align bidet seat with mounting plate
- Push seat until it locks firmly
- Turn on water supply valve
- Check all connections for leaks
Testing And Adjustments
After installing your bidet seat, you need to test and adjust it. This ensures it works well and is comfortable to use.
Testing helps you find any issues early. Adjustments let you set water pressure and temperature to your liking.
Turning On The Water Supply
First, locate the shut-off valve near your toilet. Slowly turn it counterclockwise to open the water supply.
You should hear water flowing into the bidet seat. Make sure it is fully open for proper water flow.
Checking For Leaks
Look at all connections where the water hose meets the bidet and valve. Check for any water drops or wet spots.
Wipe these areas dry, then watch for leaks while the water is on. Tighten fittings if you see water escaping.
- Check hose connections
- Inspect the shut-off valve
- Look under the toilet seat area
- Tighten loose fittings gently
Adjusting Water Pressure And Settings
Your bidet seat has controls for water pressure and spray settings. Adjust them slowly to avoid discomfort.
Start with low pressure, then increase until it feels right. Set the temperature and spray position next.
- Use the control panel or remote
- Adjust pressure to low or medium first
- Set temperature to a comfortable level
- Move spray nozzle to your preference

Credit: www.manybidets.com
Maintenance Tips For Longevity
Installing a bidet seat is easy, but keeping it working well takes care. Regular maintenance helps your bidet last longer. It also keeps it clean and safe to use.
Follow simple steps to maintain your bidet seat. These tips help avoid damage and fix small problems fast.
Regular Cleaning
Clean your bidet seat often to stop germs and dirt build-up. Use mild soap and soft cloths. Avoid harsh chemicals that can damage parts.
Focus on the nozzle, seat, and control panel. Clean nozzles carefully to keep water flow clear and fresh.
- Turn off water and unplug before cleaning
- Use warm water with mild soap
- Wipe the nozzle gently with a soft brush
- Dry all parts with a soft cloth
- Do not spray water directly on the control panel
- Clean at least once a week for best results
Troubleshooting Common Issues
If your bidet seat stops working or acts strange, check a few things first. Many problems have simple fixes.
Look for water leaks, weak spray, or no power. Reset the seat by unplugging and plugging it back in. Check the water supply valve is open.
- Check power connection and try another outlet
- Make sure the water hose is tight and not blocked
- Clean clogged nozzles with a soft brush
- Reset the seat if controls do not respond
- Look for error codes on the display and refer to the manual
Frequently Asked Questions
What Tools Are Needed To Install A Bidet Seat?
You need a wrench, screwdriver, and T-valve for installation. Some kits include all necessary parts. Ensure water supply is off before starting.
How Long Does It Take To Install A Bidet Seat?
Installation typically takes 30 to 60 minutes. Time varies by experience and toilet type. Following instructions carefully ensures a smooth process.
Can I Install A Bidet Seat Myself?
Yes, most bidet seats are designed for DIY installation. Basic plumbing knowledge helps but is not mandatory. Instructions are usually clear and user-friendly.
Will A Bidet Seat Fit My Toilet?
Most bidet seats fit standard toilets. Check your toilet’s shape (round or elongated) before buying. Measure to ensure compatibility for a proper fit.
Conclusion
Installing a bidet seat can improve bathroom comfort easily. Follow each step carefully for a smooth setup. Take your time and double-check connections to avoid leaks. You don’t need special tools or expert help. Enjoy cleaner, fresher hygiene with your new bidet seat.
Small effort brings great daily benefits. Ready to try it yourself?


