

17 min read
Are you tired of struggling with your bathtub spout every time you want to switch between filling the tub and using the shower? Installing a bathtub spout diverter can solve this problem quickly and easily.
With the right steps, you can enjoy seamless control over your water flow without calling a plumber. In this guide, you’ll learn exactly how to install a bathtub spout diverter yourself, saving time and money while upgrading your bathroom experience.
Keep reading to discover simple tips that will make your installation smooth and hassle-free.
Tools And Materials Needed
Installing a bathtub spout diverter requires the right tools and materials. This helps you finish the job safely and quickly.
Knowing what you need before starting will save time and avoid frustration during installation.
Essential Tools
You need some basic tools to remove the old spout and fit the new diverter. These tools help you work precisely.
- Adjustable wrench for tightening and loosening nuts
- Pipe wrench to grip and turn pipes
- Flathead screwdriver to remove screws
- Plumber’s tape to seal pipe threads
- Hacksaw to cut pipes if needed
- Rag or cloth to clean the area
Choosing The Right Diverter
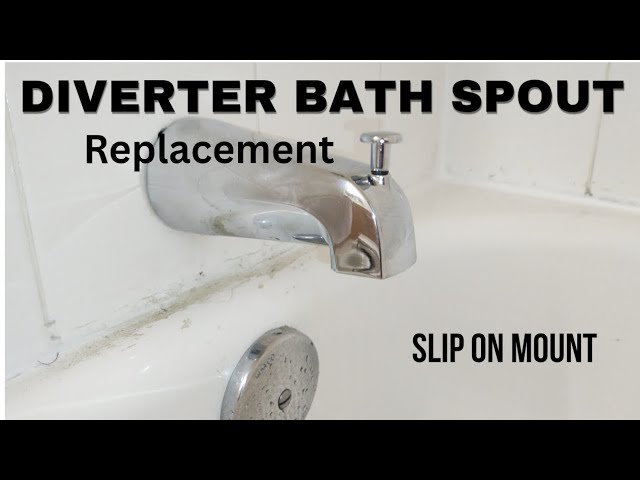
Select a diverter that fits your bathtub spout and plumbing. Check if your spout uses slip-on or threaded connection.
Pick a diverter with good quality to prevent leaks and last longer. Consider the water flow style you want.
- Slip-on diverters slide over the pipe and secure with a set screw
- Threaded diverters screw onto threaded pipes
- Check the diverter size matches your pipe diameter
- Choose a diverter that controls water flow smoothly
Additional Supplies
Besides tools and the diverter, some supplies help ensure a clean and leak-free installation.
- Silicone plumber’s grease to lubricate seals and fittings
- Rags or towels to wipe water spills
- Bucket to catch any water during removal
- Cleaning brush to remove old debris from pipes
- Protective gloves for hand safety

Credit: www.amazon.ca
Preparing For Installation
Installing a bathtub spout diverter needs some preparation. Taking the right steps makes the job easier.
Get your tools ready and follow safety steps before you start. This guide will help you prepare properly.
Turning Off Water Supply
Always turn off the water before removing the old spout. This stops water from flowing and avoids mess.
Find the main shut-off valve for your bathroom or house. Close it fully to stop the water.
- Locate the main water valve
- Turn the valve clockwise to close
- Open a faucet to check water stops
- Use a wrench if the valve is stiff
Removing Old Spout
Remove the old spout carefully to avoid damage. Some spouts screw off, others need a wrench.
Check how your spout is fixed. If it has a set screw, loosen it first before pulling the spout off.
- Look for a visible set screw below the spout
- Use an Allen wrench or screwdriver to loosen it
- Twist the spout counterclockwise to unscrew
- Pull the spout gently to remove it
Cleaning The Pipe
Clean the pipe before installing the new spout. Dirt or old tape can block a good seal.
Use a cloth to wipe the pipe. Remove old plumber’s tape or debris carefully.
- Check the pipe for rust or damage
- Use sandpaper if needed to smooth the surface
- Wrap new plumber’s tape if the spout screws on
- Make sure the pipe is dry and clean
Installing The Diverter Spout
Installing a bathtub spout diverter is a simple task. It allows you to switch water flow between the tub and the shower.
This guide helps you install the diverter spout step by step. Follow the instructions carefully for a tight fit.
Applying Plumber’s Tape
Use plumber’s tape to seal the threads on the pipe. This prevents leaks and ensures a secure connection.
Wrap the tape clockwise around the pipe threads two to three times. Make sure it covers all threads evenly.
Attaching The New Spout
Align the new diverter spout with the pipe. Slide it onto the pipe threads carefully.
Turn the spout clockwise by hand until it feels snug. Avoid cross-threading to protect the pipe.
- Check that the diverter lever moves freely
- Make sure the spout is straight and flush against the wall
- Do not overtighten by hand
Securing The Diverter
Use an adjustable wrench or pliers to tighten the spout. Turn it slightly more to secure it firmly.
Place a cloth between the tool and spout to avoid scratches. Test the diverter by switching between tub and shower flow.
- Do not overtighten to prevent damage
- Ensure no water leaks from the connection
- Adjust the spout position if needed

Credit: www.amazon.ca
Testing The Diverter Function
After installing the bathtub spout diverter, testing its function is important. This ensures water flows properly to the tub or shower.
Testing helps find leaks and verifies the diverter switches smoothly. Proper adjustment improves your bathing experience.
Checking For Leaks
Turn on the water and check around the diverter for any drips or moisture. Leaks can cause water damage if not fixed.
Look closely at the connections where the diverter meets the spout. Tighten fittings if you see any leaks.
- Run water for a few minutes
- Inspect all joints and seals
- Tighten or reseal if leaks appear
- Dry the area to confirm no slow leaks
Switching Between Tub And Shower
Test the diverter by switching water flow from the tub to the shower. This confirms the diverter moves water properly.
Pull or push the diverter knob to change the water direction. Water should stop flowing from the tub spout when shower starts.
- Turn on the tub faucet
- Operate the diverter to direct water to the shower
- Check that water stops from the tub spout
- Switch back and confirm water returns to the tub
Adjusting The Diverter
If the diverter does not switch smoothly, it may need adjustment. Small tweaks can improve its function.
Loosen or tighten the diverter knob as needed. Ensure it moves freely without sticking or slipping.
- Check if the diverter knob feels tight or loose
- Adjust the screw or nut on the knob
- Test the diverter after each adjustment
- Repeat until water switches cleanly
Troubleshooting Common Issues
Installing a bathtub spout diverter can make bath time easier. Sometimes problems come up after installation.
This guide helps you fix common issues with your bathtub spout diverter quickly and easily.
Dealing With Leaks
Leaks around the bathtub spout diverter can waste water and cause damage. Check the diverter and spout for cracks or loose parts.
Make sure the diverter is tightly screwed onto the pipe. Use plumber’s tape on the threads to stop leaks.
- Turn off water before fixing leaks.
- Remove the spout and inspect the diverter.
- Wrap plumber’s tape around the pipe threads.
- Reattach the spout and check for leaks.
Fixing Low Water Pressure
Low water pressure can make it hard to switch between tub and shower. Check if the diverter or spout is clogged.
Clean any buildup inside the spout or diverter. Sometimes debris blocks water flow and lowers pressure.
- Remove the spout carefully.
- Look for mineral deposits or dirt inside.
- Use vinegar to dissolve buildup if needed.
- Flush the pipes with water before reattaching.
Handling Stuck Diverters
A stuck diverter may not move or switch water flow correctly. This can happen if parts get worn or dirty.
Try gently moving the diverter back and forth. Use lubricant safe for plumbing to loosen stuck parts.
- Turn off water supply before working.
- Apply plumber’s grease to the diverter mechanism.
- Move the diverter handle slowly several times.
- Replace the diverter if it stays stuck.

Credit: www.youtube.com
Maintaining Your Bathtub Diverter
Keeping your bathtub diverter in good shape helps it work well longer. Regular care stops leaks and blockages.
Simple steps can keep your diverter clean and free from damage. This saves you time and money.
Regular Cleaning Tips
Clean the diverter often to avoid dirt and soap buildup. Use a soft cloth or sponge with mild soap.
Do not use harsh chemicals or rough scrubbers. They can scratch or damage the surface.
- Wipe the diverter after each use to keep it dry
- Use a toothbrush to clean small crevices gently
- Rinse with warm water and dry with a soft cloth
Preventing Mineral Buildup
Mineral deposits from hard water can block the diverter. Remove buildup before it causes problems.
Use vinegar or a mild acid solution to dissolve minerals safely. Soak a cloth and wrap it around the diverter for 15 minutes.
- Apply white vinegar with a cloth or sponge
- Let it sit for 10 to 15 minutes
- Scrub gently with a soft brush if needed
- Rinse thoroughly with warm water
- Dry with a soft towel to prevent new buildup
When To Replace The Diverter
Replace the diverter if it leaks or does not switch water flow properly. Damaged parts reduce bathtub use.
Check for cracks, rust, or stuck handles. If cleaning does not fix these, a new diverter is needed.
- Leaks under the spout or around the diverter
- Water does not flow to the shower when switched
- Broken or stiff lever or knob
- Visible damage or corrosion on the diverter
Frequently Asked Questions
What Tools Are Needed To Install A Bathtub Spout Diverter?
You need a wrench, plumber’s tape, screwdriver, and a new spout diverter. These tools help ensure a secure and leak-free installation. Always turn off water supply before starting the installation process.
How Do You Remove An Old Bathtub Spout Diverter?
Turn off the water supply. Use a wrench or screwdriver to unscrew the old spout. If stuck, apply gentle force or use a lubricant. Clean the pipe threads before installing the new diverter spout.
How To Prevent Leaks After Installing A Spout Diverter?
Wrap plumber’s tape around pipe threads before attaching the spout. Tighten the spout securely but avoid overtightening. Test by running water to check for leaks. Re-tighten if minor leaks appear.
Can I Install A Bathtub Spout Diverter Myself?
Yes, installation is straightforward for most DIYers. Basic plumbing skills and tools are required. Follow manufacturer instructions carefully. If unsure, consult a professional plumber to avoid damage or leaks.
Conclusion
Installing a bathtub spout diverter can enhance your bathroom experience. It’s a simple task with the right tools and guidance. Follow each step carefully for the best results. Always ensure you have the correct parts before starting. This avoids unnecessary delays and frustration.
Regular maintenance will keep your diverter working smoothly. Now, you can enjoy a more efficient shower experience. Remember, practice makes perfect. So don’t worry if it takes a few tries. Keep your tools handy and your patience steady. Happy plumbing!

