

17 min read
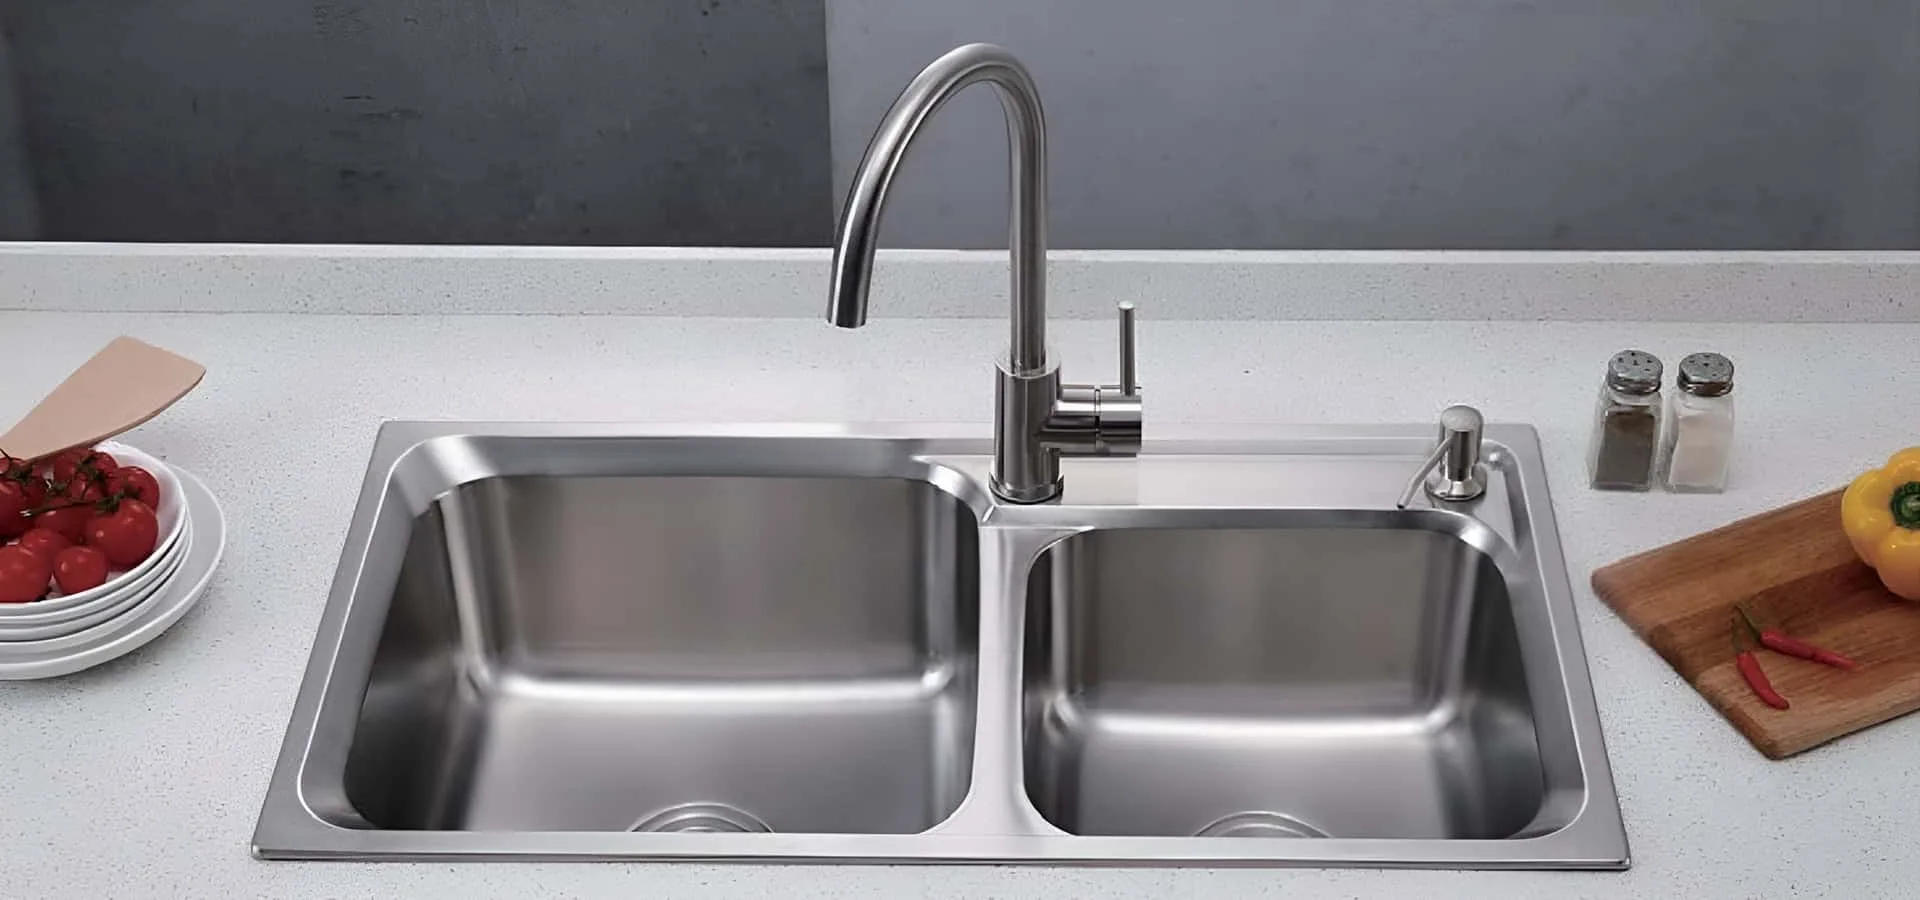
Are you tired of cluttered countertops and messy soap bottles? Installing a soap dispenser directly into your sink can transform your kitchen or bathroom, making handwashing cleaner and more convenient.
Imagine reaching for soap with just one hand, without fumbling for a bottle or dealing with spills. This simple upgrade not only looks sleek but also saves space and keeps your area tidy. You’ll discover easy, step-by-step instructions to install a soap dispenser yourself—even if you’ve never done it before.
Keep reading to learn how you can enhance your sink’s functionality in no time.
Credit: www.homedepot.com
Choosing The Right Soap Dispenser
Installing a soap dispenser into your sink makes washing hands easier. Picking the right dispenser helps it work well and look good.
Think about the type, material, and size before buying. This guide helps you choose the best one for your sink.
Types Of Soap Dispensers
Soap dispensers come in different styles. Choose one that fits your needs and sink design.
- Built-in dispensers: Installed directly into the sink or countertop.
- Wall-mounted dispensers: Fixed on the wall near the sink.
- Countertop dispensers: Sit on the counter and are easy to move.
- Automatic dispensers: Use sensors to release soap without touching.
Material And Finish Options
Choose materials that match your sink and are easy to clean. The finish affects the look and durability.
- Stainless steel: Strong and resists rust, good for wet areas.
- Plastic: Lightweight and affordable, but may wear out faster.
- Brass: Durable and adds a classic style.
- Chrome finish: Shiny and modern, matches many faucets.
- Matte finish: Hides fingerprints and water spots well.
Measuring For Compatibility
Measure your sink’s hole size before buying a dispenser. The dispenser must fit well to avoid leaks.
- Check the diameter of the hole in your sink or countertop.
- Measure the thickness of the countertop to ensure the dispenser can be installed.
- Look at the pump height to avoid hitting cabinets or shelves under the sink.
- Confirm the soap bottle size fits in the space below the sink.

Credit: www.amazon.com
Gathering Tools And Materials
Installing a soap dispenser into a sink is a simple task. Getting the right tools and materials ready helps the job go smoothly.
Before you start, gather everything you need. This saves time and avoids interruptions.
Essential Tools Needed
Some tools are required to install the soap dispenser properly. These tools help you make holes, tighten parts, and secure the dispenser.
- Adjustable wrench for tightening nuts
- Screwdriver (flathead or Phillips)
- Drill with a drill bit (if a hole is needed)
- Measuring tape to check sizes
- Utility knife to cut any seals or packaging
Additional Supplies To Have Ready
Besides tools, some supplies make installation easier and cleaner. These items help with sealing and support.
- Plumber’s putty or silicone sealant to prevent leaks
- Rags or paper towels for cleaning up spills
- Bucket to catch water drips
- Replacement washers or gaskets
- Soap dispenser kit with mounting hardware
Preparing The Sink Area
Installing a soap dispenser needs a clean and ready workspace. Preparing the sink area helps make the installation smooth.
Proper preparation prevents damage and saves time during the process.
Clearing The Workspace
Remove all items around the sink to create space. This makes it easier to work and avoids accidents.
Clear the countertop and under the sink. Keep tools and parts close but out of the way.
- Take away soap bottles and cleaning supplies
- Clear dishes and utensils from the sink
- Organize tools needed for installation
- Wipe the area to remove dirt or spills
Shutting Off Water Supply
Turn off the water supply to avoid leaks during installation. This step protects your plumbing and prevents messes.
Locate the shut-off valves under the sink and close them. Check that no water flows when you turn the faucet on.
- Find hot and cold water valves under the sink
- Turn the valves clockwise to close them
- Open the faucet to release any remaining water
- Use a towel to catch drips if needed
Removing Old Dispenser Or Drilling Hole
Installing a soap dispenser into your sink may need you to remove an old one. Sometimes you must drill a new hole for the new dispenser. This guide helps you with both tasks.
Careful work makes sure your sink stays undamaged. Follow simple steps for a smooth installation.
Detaching Existing Soap Dispenser
First, clear the area under the sink. Find the soap dispenser’s mounting nut. It holds the dispenser in place.
Unscrew the nut by hand or with a wrench. Pull the dispenser out from the top of the sink. Disconnect the soap tube from the dispenser.
- Turn off the water supply for safety.
- Use a wrench for tight nuts.
- Keep all parts for reuse or disposal.
Drilling A Hole For New Installation
Check your sink material before drilling. Use a drill bit made for the sink type. Mark the spot where you want the hole.
Start drilling slowly to avoid cracks. Use tape over the mark to keep the drill from slipping. Clean the area after drilling.
- Wear safety glasses to protect your eyes.
- Use a drill bit for ceramic, metal, or granite.
- Drill from the top surface down slowly.
- Remove dust and debris after drilling.
Installing The New Soap Dispenser
Installing a soap dispenser on your sink makes washing hands easier. This guide helps you put the new dispenser in place.
Follow the steps carefully to position and secure the dispenser properly under your sink.
Positioning The Dispenser Pump
Choose a spot on the sink where the dispenser pump fits well. Usually, the hole near the faucet is the best place.
Make sure the pump is easy to reach and does not block the faucet or handles.
- Check the sink hole size matches the dispenser base.
- Place the pump so it points towards the sink basin.
- Ensure enough space for the pump to move up and down.
Securing The Dispenser Under The Sink
After positioning, secure the dispenser from below the sink. This keeps it stable and prevents leaks.
Tighten the mounting nut or bracket by hand first, then use a wrench if needed. Do not overtighten.
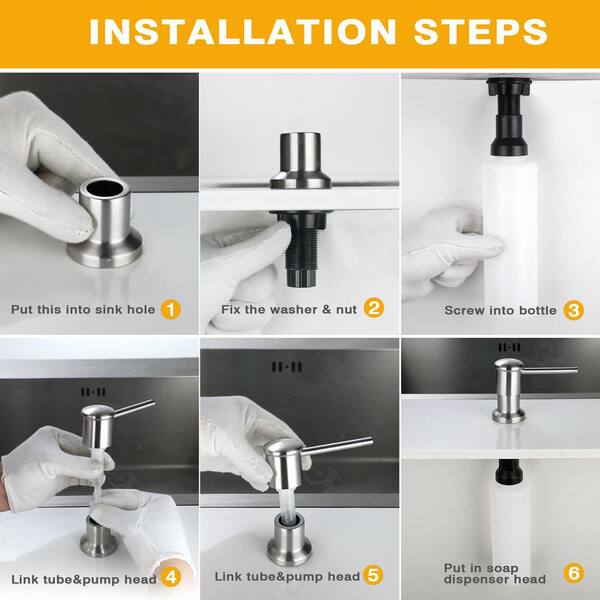
- Slide the dispenser tube through the sink hole.
- From under the sink, screw the mounting nut onto the dispenser tube.
- Hold the dispenser pump firmly while tightening.
- Attach the soap bottle or refill container to the tube.

Credit: www.amazon.com
Connecting Soap Container
Installing a soap dispenser in your sink makes hand washing easy and clean. The key part is connecting the soap container to the dispenser.
This guide helps you attach the soap bottle and test the dispenser for smooth use.
Attaching The Soap Bottle
First, find the soap bottle that fits under your sink. Check that it matches the dispenser tube size.
Place the soap bottle under the sink hole. Screw the bottle’s neck into the dispenser pump tightly to avoid leaks.
- Ensure the bottle is clean before attaching.
- Push the tube firmly into the bottle opening.
- Tighten the bottle cap to secure the connection.
Filling And Testing The Dispenser
Fill the soap bottle with liquid soap. Avoid overfilling to prevent spills when installing.
Press the dispenser pump several times. This action draws soap into the tube and checks the flow.
- If soap does not come out, check tube connection.
- Clean any soap spills with a cloth.
- Adjust the pump pressure for a smooth soap flow.
Maintenance Tips For Longevity
Installing a soap dispenser in your sink makes washing hands easier. To keep it working well, you need to maintain it regularly.
Good care helps the dispenser last longer and prevents problems like leaks or clogs.
Regular Cleaning
Clean the soap dispenser every week to stop soap buildup. Use warm water and a soft cloth to wipe the outside.
Remove the pump and rinse it with warm water. This keeps the pump working smoothly and stops soap from hardening inside.
- Wipe the dispenser surface to remove soap and dirt
- Rinse the pump under warm water to clear soap residue
- Dry parts before putting them back to avoid water damage
Preventing Clogs And Leaks
Check the dispenser for leaks or blockages often. If soap does not come out, the pump might be clogged.
Use liquid soap that is not too thick. Thick soap can clog the pump and cause leaks around the sink.
- Use thin liquid soap for easy flow
- Inspect the pump and hose for damage or cracks
- Replace worn parts to stop leaks early
- Flush the dispenser with warm water if clogged
Frequently Asked Questions
How Do I Install A Soap Dispenser Into My Sink?
First, choose the right hole or drill one. Insert the dispenser body, secure it underneath, then attach the pump on top. Fill the reservoir with soap and test the pump to ensure proper function.
What Tools Are Needed For Soap Dispenser Installation?
You typically need a drill, adjustable wrench, screwdriver, and plumber’s putty. These tools help create the hole, tighten fittings, and seal around the dispenser for a leak-proof setup.
Can I Install A Soap Dispenser Without Professional Help?
Yes, most soap dispensers are DIY-friendly. Follow the instructions carefully, use the right tools, and ensure the sink hole fits the dispenser size for an easy installation.
How Do I Refill The Soap Dispenser In The Sink?
Lift or unscrew the pump head from the top. Pour liquid soap directly into the reservoir, then replace the pump securely to avoid spills.
Conclusion
Installing a soap dispenser into your sink is simple and rewarding. It adds convenience and keeps your kitchen tidy. Follow each step carefully for the best results. Double-check your tools and materials before starting. Take your time and ensure everything fits well.
This small upgrade can make a big difference. Enjoy a clutter-free and efficient kitchen. Remember, practice makes perfect. You can do it! With these tips, your installation will go smoothly. Happy installing!

