19 min read
Imagine transforming your bathroom experience with a simple upgrade that promises cleanliness, comfort, and a touch of luxury. If you’ve ever thought about making a change, installing a bidet wand sprayer might be just what you need.
It’s not just about hygiene; it’s about enhancing your daily routine with a splash of sophistication. But where do you start? Don’t worry, you’re not alone if the thought of installation feels a bit daunting. This guide will walk you through the process step-by-step, making it easy and straightforward.
You won’t need to call in a professional or spend a fortune. By the end of this article, you’ll know exactly how to install a bidet wand sprayer, ensuring you get it right the first time. Ready to revolutionize your bathroom routine? Let’s dive into the details and get you set up for a fresher and more comfortable experience.

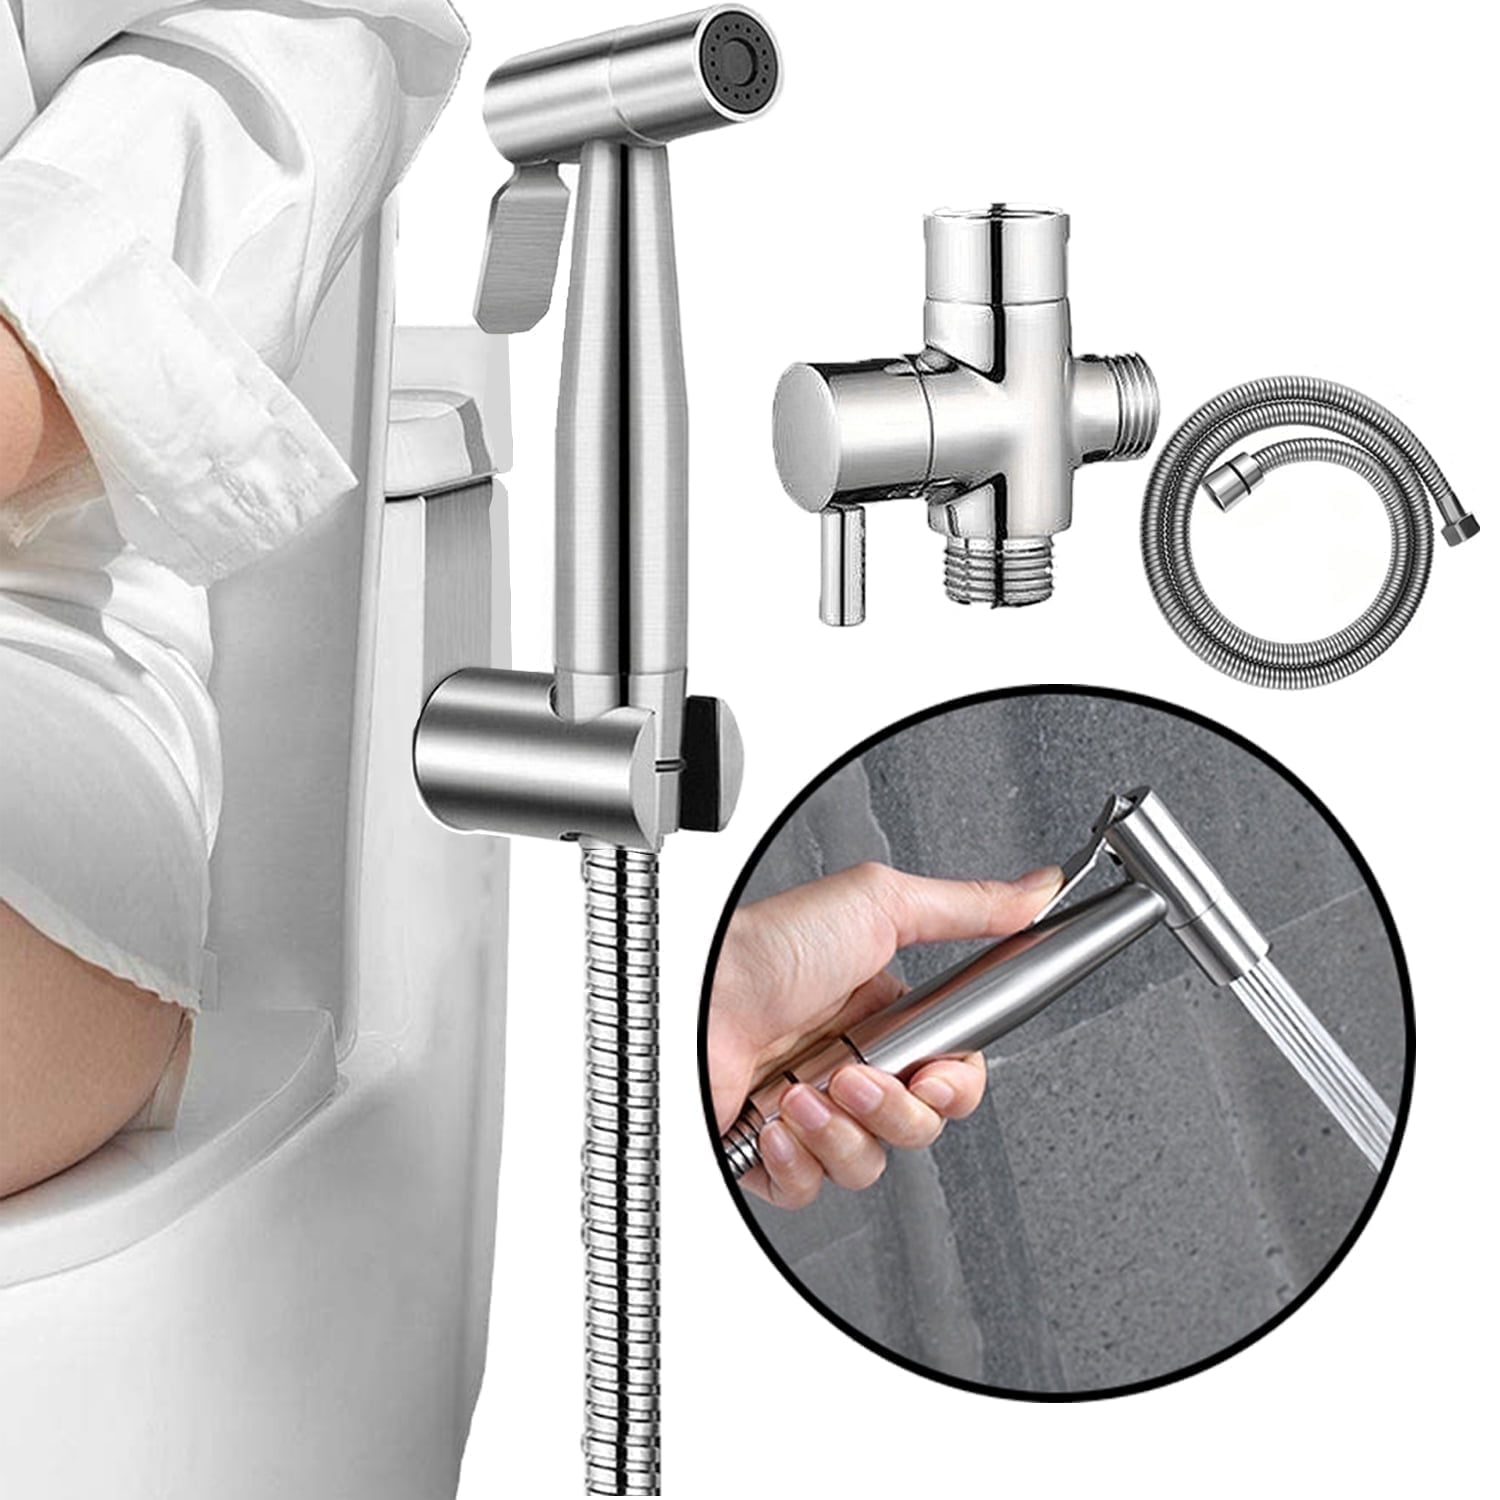
Credit: www.walmart.com
Choosing The Right Bidet Wand
Installing a bidet wand sprayer can improve your bathroom experience. Picking the right wand is important for comfort and ease of use.
This guide helps you understand different types, materials, and features to consider before buying a bidet wand sprayer.
Types Of Bidet Wand Sprayers
Bidet wands come in various styles. Each type offers different spray patterns and controls for cleaning.
- Single-spray wands:Simple design with one water spray setting.
- Multi-spray wands:Offer several spray options like soft, massage, or strong.
- Handheld sprayers:Allow you to control direction and pressure manually.
- Wall-mounted wands:Fixed in place, easy to access and use.
Materials And Durability
Material quality affects how long your bidet wand lasts. Strong materials resist wear and damage.
Common materials include plastic, stainless steel, and chrome. Each has pros and cons.
- Plastic:Lightweight and affordable but can crack over time.
- Stainless steel:Very durable and resists rust and corrosion.
- Chrome-plated metal:Stylish look and good durability but may scratch.
Features To Consider
Some features make bidet wands easier and safer to use. Choose ones that fit your needs.
- Adjustable water pressure:Lets you control spray strength.
- Ergonomic handle:Comfortable grip for better control.
- Self-cleaning nozzle:Keeps the spray tip clean automatically.
- Easy installation:Fits standard toilets without extra tools.
- Anti-leak valves:Prevent water leaks for safety and savings.
Gathering Necessary Tools
Installing a bidet wand sprayer needs some tools. Having the right tools makes the job easier and faster.
Before starting, gather everything you need. This helps avoid delays during installation.
Essential Tools List
These tools are required to install a bidet wand sprayer properly. Make sure you have them ready.
- Adjustable wrench – to tighten or loosen fittings
- Screwdriver – for mounting brackets or clips
- Teflon tape (plumber’s tape) – to seal threaded connections
- Bucket or small container – to catch water during disconnection
- Towels or rags – to clean spills and dry surfaces
- Flashlight – to see under the toilet or in dark spaces
Optional Accessories
Optional tools and accessories can improve installation comfort and sprayer use. These are not necessary but helpful.
- Pipe cutter – for cutting water supply pipes if needed
- Extra washers – to replace old or worn-out seals
- Mounting adhesive or double-sided tape – for alternative bracket fixing
- Silicone sealant – to secure connections and prevent leaks
- Spare hose – in case the included hose is too short
Preparing The Installation Area
Before installing a bidet wand sprayer, prepare the area properly. This helps make the process safe and smooth.
Focus on turning off the water and clearing space around the toilet. These steps prevent accidents and give you room to work.
Shutting Off Water Supply
Find the water valve near the toilet base. Turn it clockwise to close it and stop water flow.
Flush the toilet to empty the tank. This lowers water pressure and avoids leaks during installation.
- Locate the shutoff valve behind or beside the toilet
- Turn the valve clockwise until it stops
- Flush the toilet to drain water from the tank
Clearing The Toilet Area
Remove any items around the toilet. This includes mats, toilet brushes, and cleaning supplies.
Clear space helps you move freely. It also protects your belongings from water or dirt.
- Take away rugs and mats
- Move cleaning tools to another room
- Keep towels and clothes out of reach
Installing The T-valve
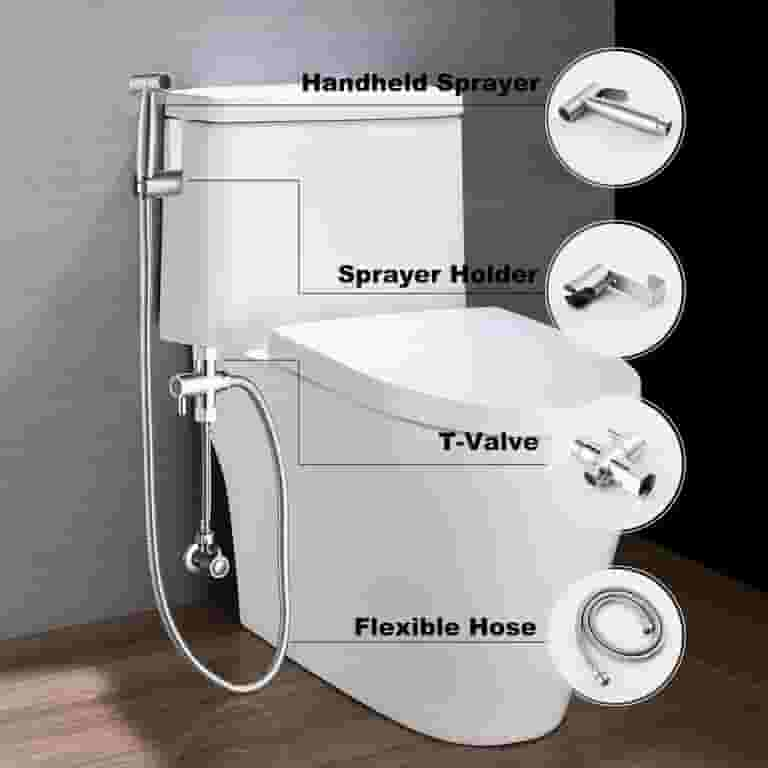
Installing the T-valve is an important step in setting up a bidet wand sprayer. The T-valve controls water flow to the sprayer.
Getting this part installed correctly helps avoid leaks and ensures steady water pressure.
Locating The Water Supply Line
The water supply line connects your toilet tank to the main water source. You need to find it before installing the T-valve.
Look under the toilet near the floor. You will see a metal or plastic hose running from the wall or floor to the toilet tank.
- Turn off the water supply by twisting the valve clockwise.
- Check that the water is off by flushing the toilet.
- Place a bucket or towel under the supply line to catch water.
Attaching The T-valve Securely
Remove the water supply hose from the toilet tank. Attach the T-valve to the tank’s water inlet.
Next, connect the water supply hose to the bottom of the T-valve. Make sure all connections are tight to stop leaks.
- Use plumber’s tape on threads for a better seal.
- Hand-tighten the connections first.
- Use a wrench to tighten slightly, but do not over-tighten.
- Attach the bidet hose to the side port of the T-valve.
- Turn on the water supply slowly and check for leaks.
Connecting The Bidet Hose
Connecting the bidet hose is an important part of installing a bidet wand sprayer. The hose links the water supply to the wand, allowing water to flow properly.
Follow the correct steps to attach the hose securely and avoid leaks. Use the right tools and parts for a safe connection.
Attaching Hose To T-valve
First, locate the T-valve on the water supply line under your toilet. This valve splits water between the toilet and the bidet wand.
Attach one end of the bidet hose to the T-valve. Tighten the connection by hand, then use a wrench for a secure fit.
- Turn off the water supply before starting
- Remove the existing hose from the toilet tank
- Connect the T-valve to the water supply line
- Attach the bidet hose to the side outlet of the T-valve
- Tighten connections to prevent leaks
Connecting Hose To Bidet Wand
Take the other end of the bidet hose and connect it to the bidet wand sprayer. This connection usually has a threaded fitting.
Hand-tighten the hose to the wand, then use a wrench to make sure it is snug. Avoid overtightening to prevent damage.
- Check the washer inside the hose connector
- Align the hose threads with the wand fitting
- Turn the hose clockwise to connect
- Use a wrench for a firm seal
- Test for leaks after connecting
Mounting The Bidet Wand Holder
Installing a bidet wand holder is an easy way to keep your bathroom tidy. It holds the sprayer securely and keeps it within reach.
This guide shows you how to mount the holder properly for convenience and safety.
Selecting A Suitable Location
Choose a spot near the toilet where you can easily reach the bidet wand. The location should be dry and not block other fixtures.
Make sure the wall or surface can support the holder and sprayer weight.
- Close to the toilet seat for easy access
- Dry area to avoid water damage
- Strong surface like tile or wood
- Not in the way of doors or drawers
Installing The Holder
Most holders come with screws and anchors for mounting. Use a drill or screwdriver to fix it firmly on the wall.
Follow these steps to install the holder securely and neatly.
- Mark the spots for screws on the chosen surface
- Drill holes for anchors if needed
- Insert wall anchors for extra support
- Screw the holder into place tightly
- Check that the holder is stable and level
Testing The Bidet Wand Sprayer
After installing your bidet wand sprayer, you need to test it carefully. Testing helps ensure it works well and has no problems.
This guide shows how to test your bidet wand sprayer safely and correctly.
Turning On The Water Supply
First, open the main water valve slowly. This lets water flow to the sprayer without sudden pressure.
Watch the sprayer handle and hose as water begins to flow. Make sure everything feels steady.
Checking For Leaks
Look closely at all connections for water drops or wet spots. Leaks can cause damage or waste water.
- Check the hose connection to the water supply.
- Inspect the sprayer handle and nozzle joints.
- Feel around for dampness on walls or floor.
If you find leaks, tighten the fittings or replace faulty parts before use.
Adjusting Water Pressure
Control the water pressure by squeezing the sprayer handle gently. Start with low pressure to avoid splashing.
If the pressure feels too low or high, adjust the main water valve slightly. Find a comfortable flow for cleaning.
- Press the handle lightly for soft water flow.
- Press harder for stronger water pressure.
- Turn the main valve to increase or decrease pressure.

Credit: crossroadoc.org
Maintenance Tips
Keeping your bidet wand sprayer clean helps it last longer. Regular care prevents clogs and leaks.
Follow simple steps to maintain your sprayer and fix common problems quickly.
Regular Cleaning
Clean the bidet wand sprayer every week to avoid buildup. Use mild soap and water to wipe the nozzle.
Remove mineral deposits by soaking the sprayer head in vinegar for 15 minutes.
- Turn off water supply before cleaning
- Use a soft cloth to wipe surfaces
- Rinse well and dry after cleaning
- Check the hose for cracks or leaks
Troubleshooting Common Issues
If the sprayer has low water pressure, check for blockages in the nozzle or hose. Clear any debris carefully.
Leaks can happen if connections are loose or washers are worn. Tighten fittings or replace washers as needed.
- Sprayer won’t spray: Check water valve is open
- Water pressure is weak: Clean nozzle and hose
- Leaks at connections: Tighten or replace washers
- Hose feels stiff or cracked: Replace hose

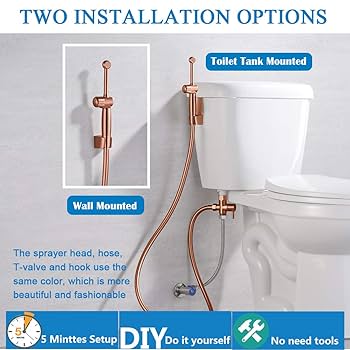
Credit: www.amazon.com.au
Frequently Asked Questions
How Do I Install A Bidet Wand Sprayer?
To install a bidet wand sprayer, turn off the water supply first. Connect the T-valve to your toilet’s fill valve. Attach the sprayer hose to the T-valve, then mount the sprayer holder near the toilet. Finally, turn on the water and test for leaks.
What Tools Are Needed For Bidet Wand Installation?
You only need a few basic tools: an adjustable wrench, a screwdriver, and plumber’s tape. These help ensure tight connections and secure mounting. Most bidet kits include necessary parts, making installation straightforward and quick for anyone.
Can I Install A Bidet Sprayer Myself?
Yes, installing a bidet sprayer is simple and DIY-friendly. It usually takes 15-30 minutes. Basic plumbing skills help, but clear instructions and minimal tools make the process easy for most homeowners.
Is Bidet Wand Installation Compatible With All Toilets?
Most bidet wands fit standard toilets with a side water supply valve. Check your toilet’s design and water valve placement. Some older or unique models might need additional adapters for proper installation.
Conclusion
Installing a bidet wand sprayer is easier than you think. Follow the steps carefully and take your time. Use the right tools and check for leaks after installation. Enjoy a cleaner and more comfortable bathroom experience. This small change can make a big difference in hygiene.
Keep your bathroom fresh and easy to maintain. Now, you have the know-how to add a bidet wand sprayer to your home. Simple, quick, and effective. Ready to give it a try?


